Add an X data source to your data flow. An X data source allows you to perform simple or advanced searches on X data, depending on your X licensing. Any X searches only return data from the last seven days.
The process to add an X data source is part of the process to build a Data Flow (ETL). For more information, see Data Flow.
Add an X Data Source to a Data Flow
Prerequisites: An admin user must have set up X as a data source to make it available for selection as part of your Data Flow. For more information, see X Setup.
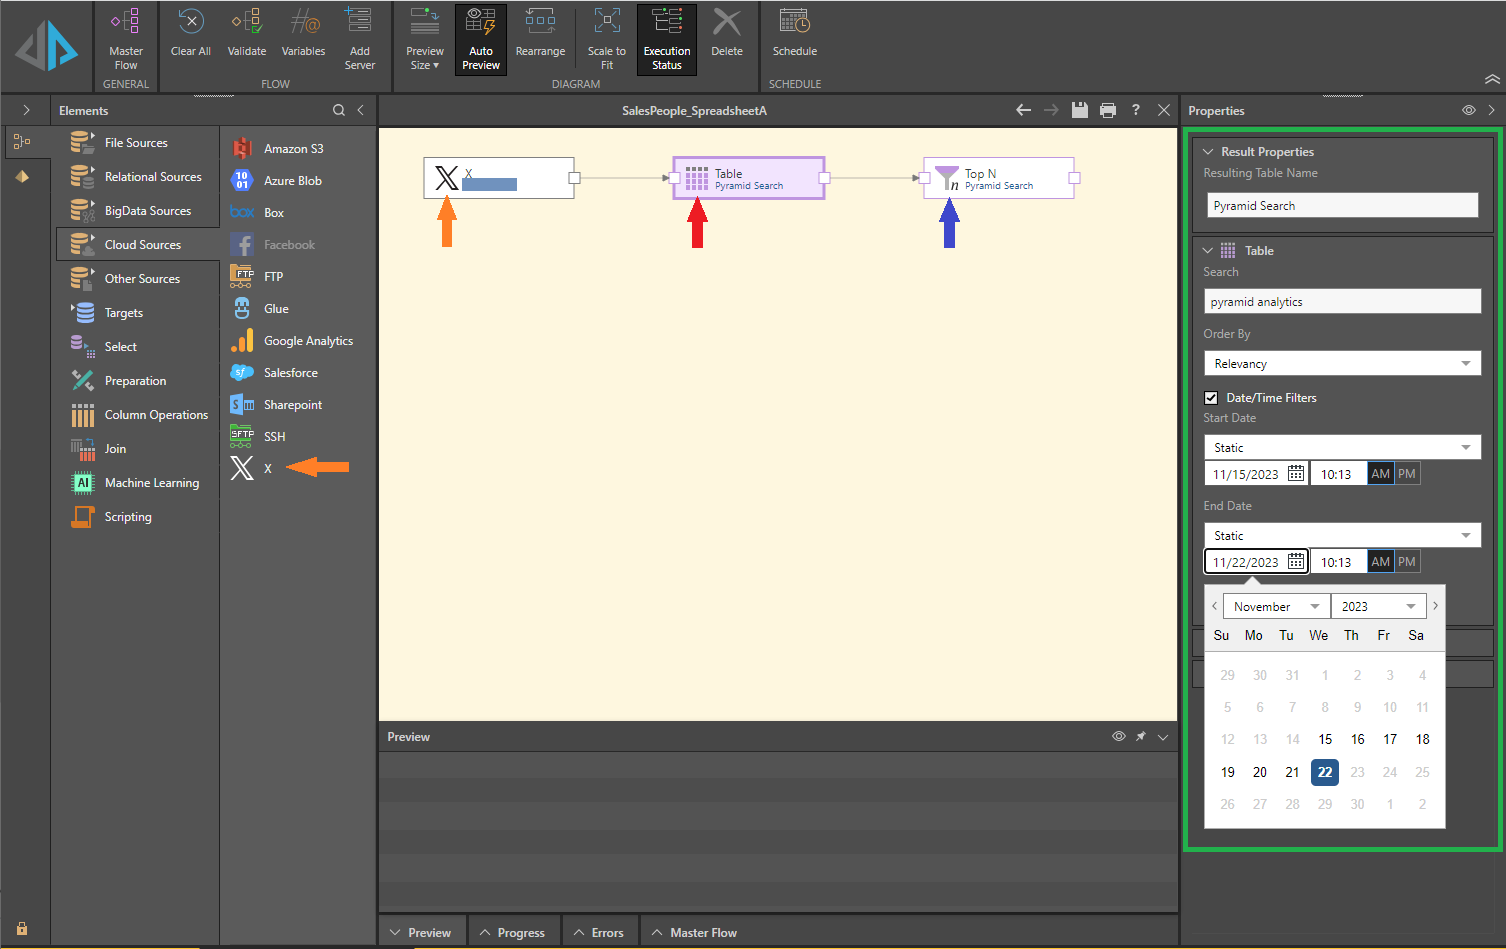
- Click Cloud Sources and drag-and-drop X onto the canvas (orange arrows), and, from the Properties panel, set:
- X Source: Select or add the required server.
- Click Add Table.
- Click the Table node (red arrow) on the canvas, and, from the Properties panel (green), set:
- Resulting Table Name: Name the given table.
- Search: Enter the required search term.
Typically the search term is a hashtag or user handle, although the scope of your searching capability depends on your licensing in X.
- Date/Time Filters: Select the checkbox to specify the date and time limits for your search results.
All searches on X data are limited to the last seven days. This is reflected in the dates and times offered for selection in the calendar tool.
Tip: Because X data is limited to results from the last seven days, you might want to use Variables instead of Static dates to ensure that you are always, say, returning data from the last five days.
- Click Apply. The preview panel opens, displaying a preview of the table columns.
- Click Save at any time to save your changes.
You can now continue building the Data Flow as usual. For more information, see Data Flow.
Note that our example shows a Select node that includes only the top N results from the search in the results (blue arrow). For more information, see Top N.